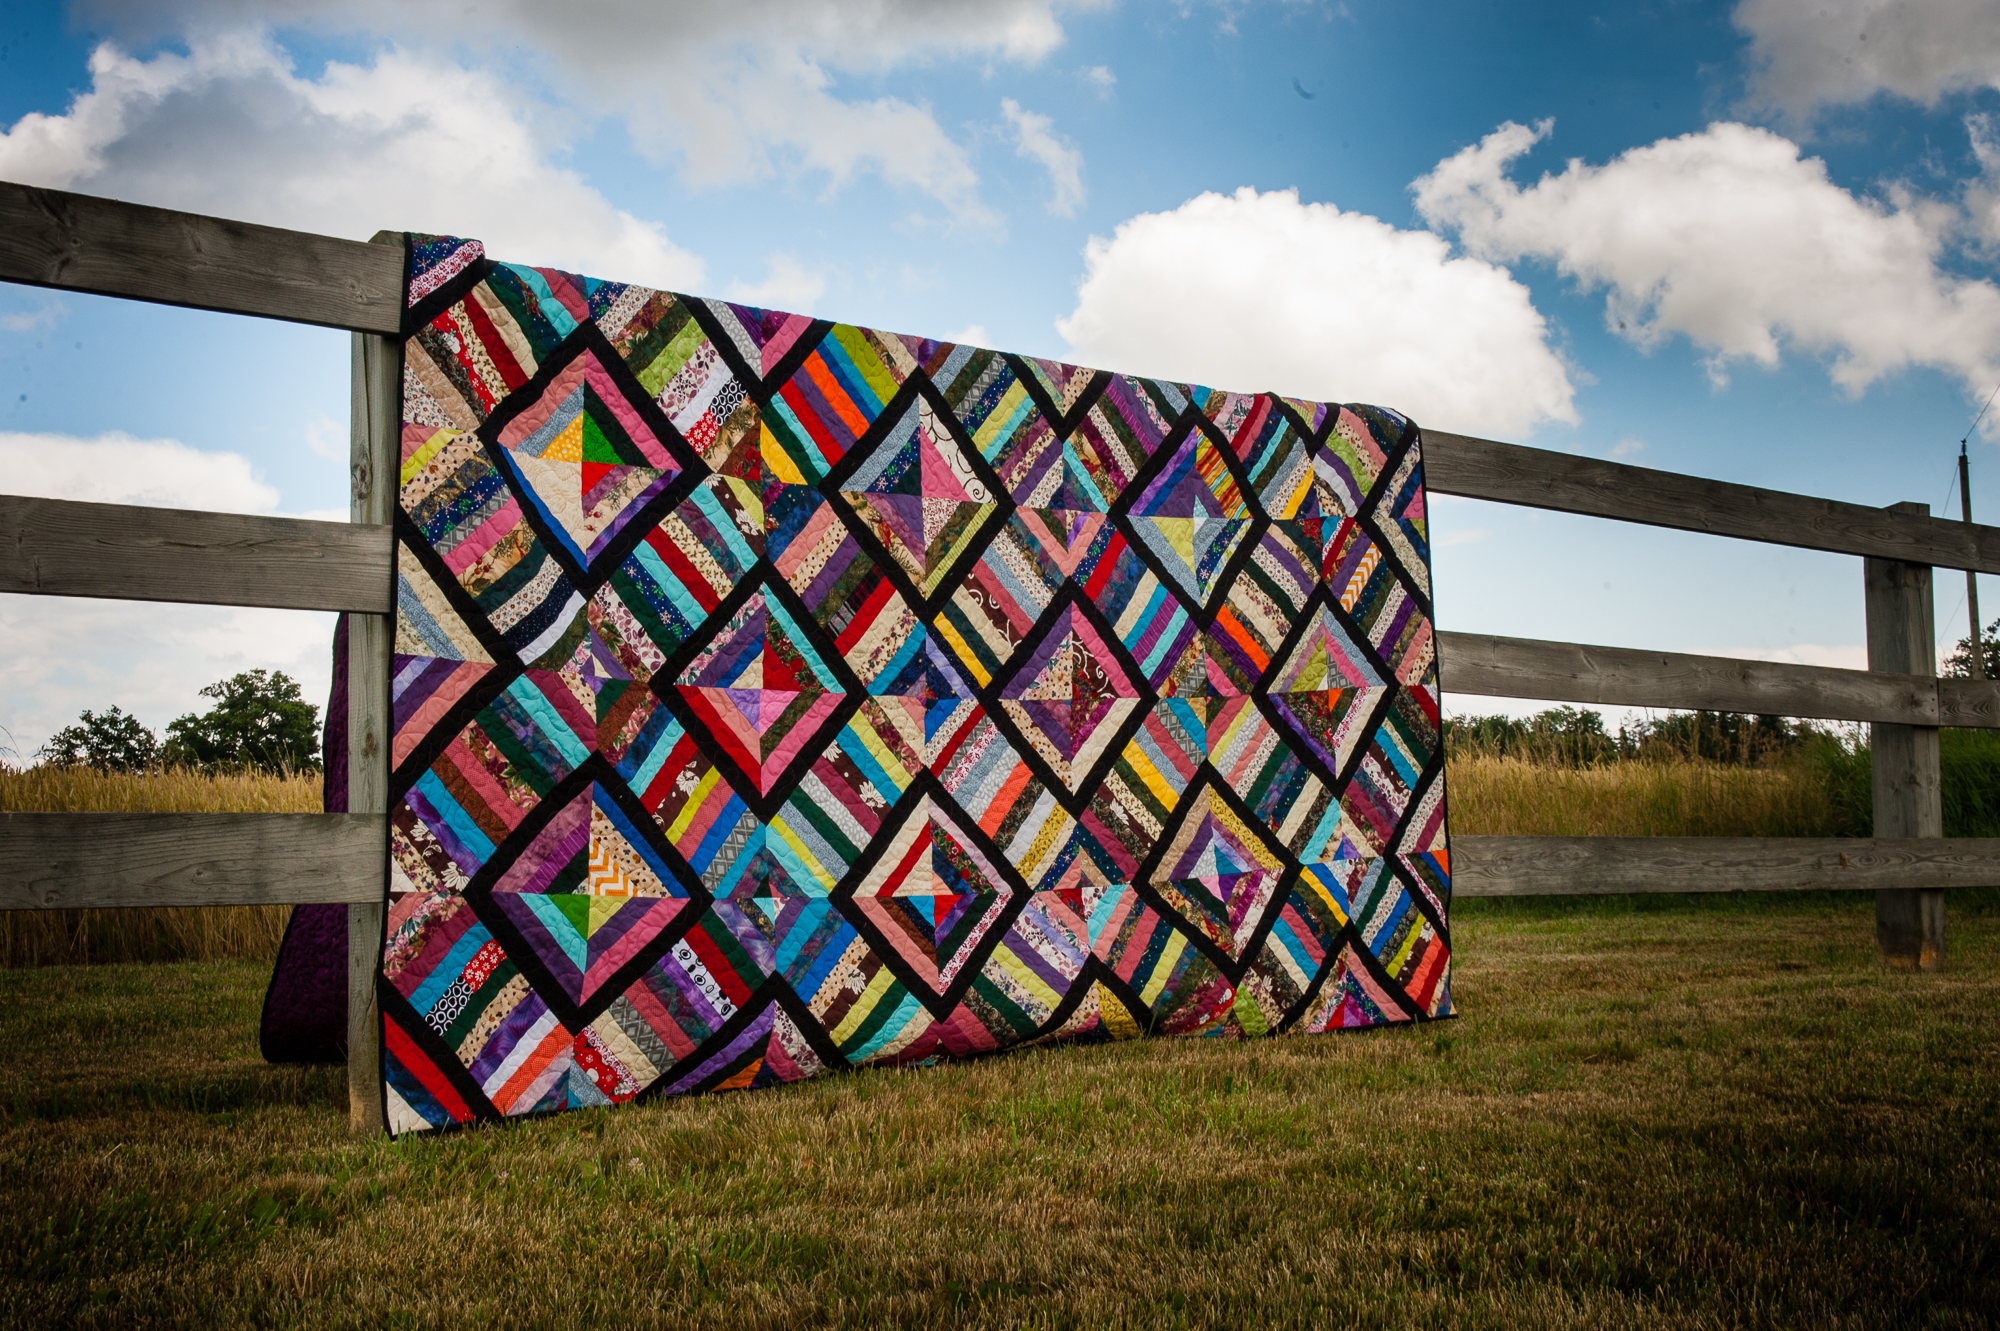
Mom’s Stash String Quilt
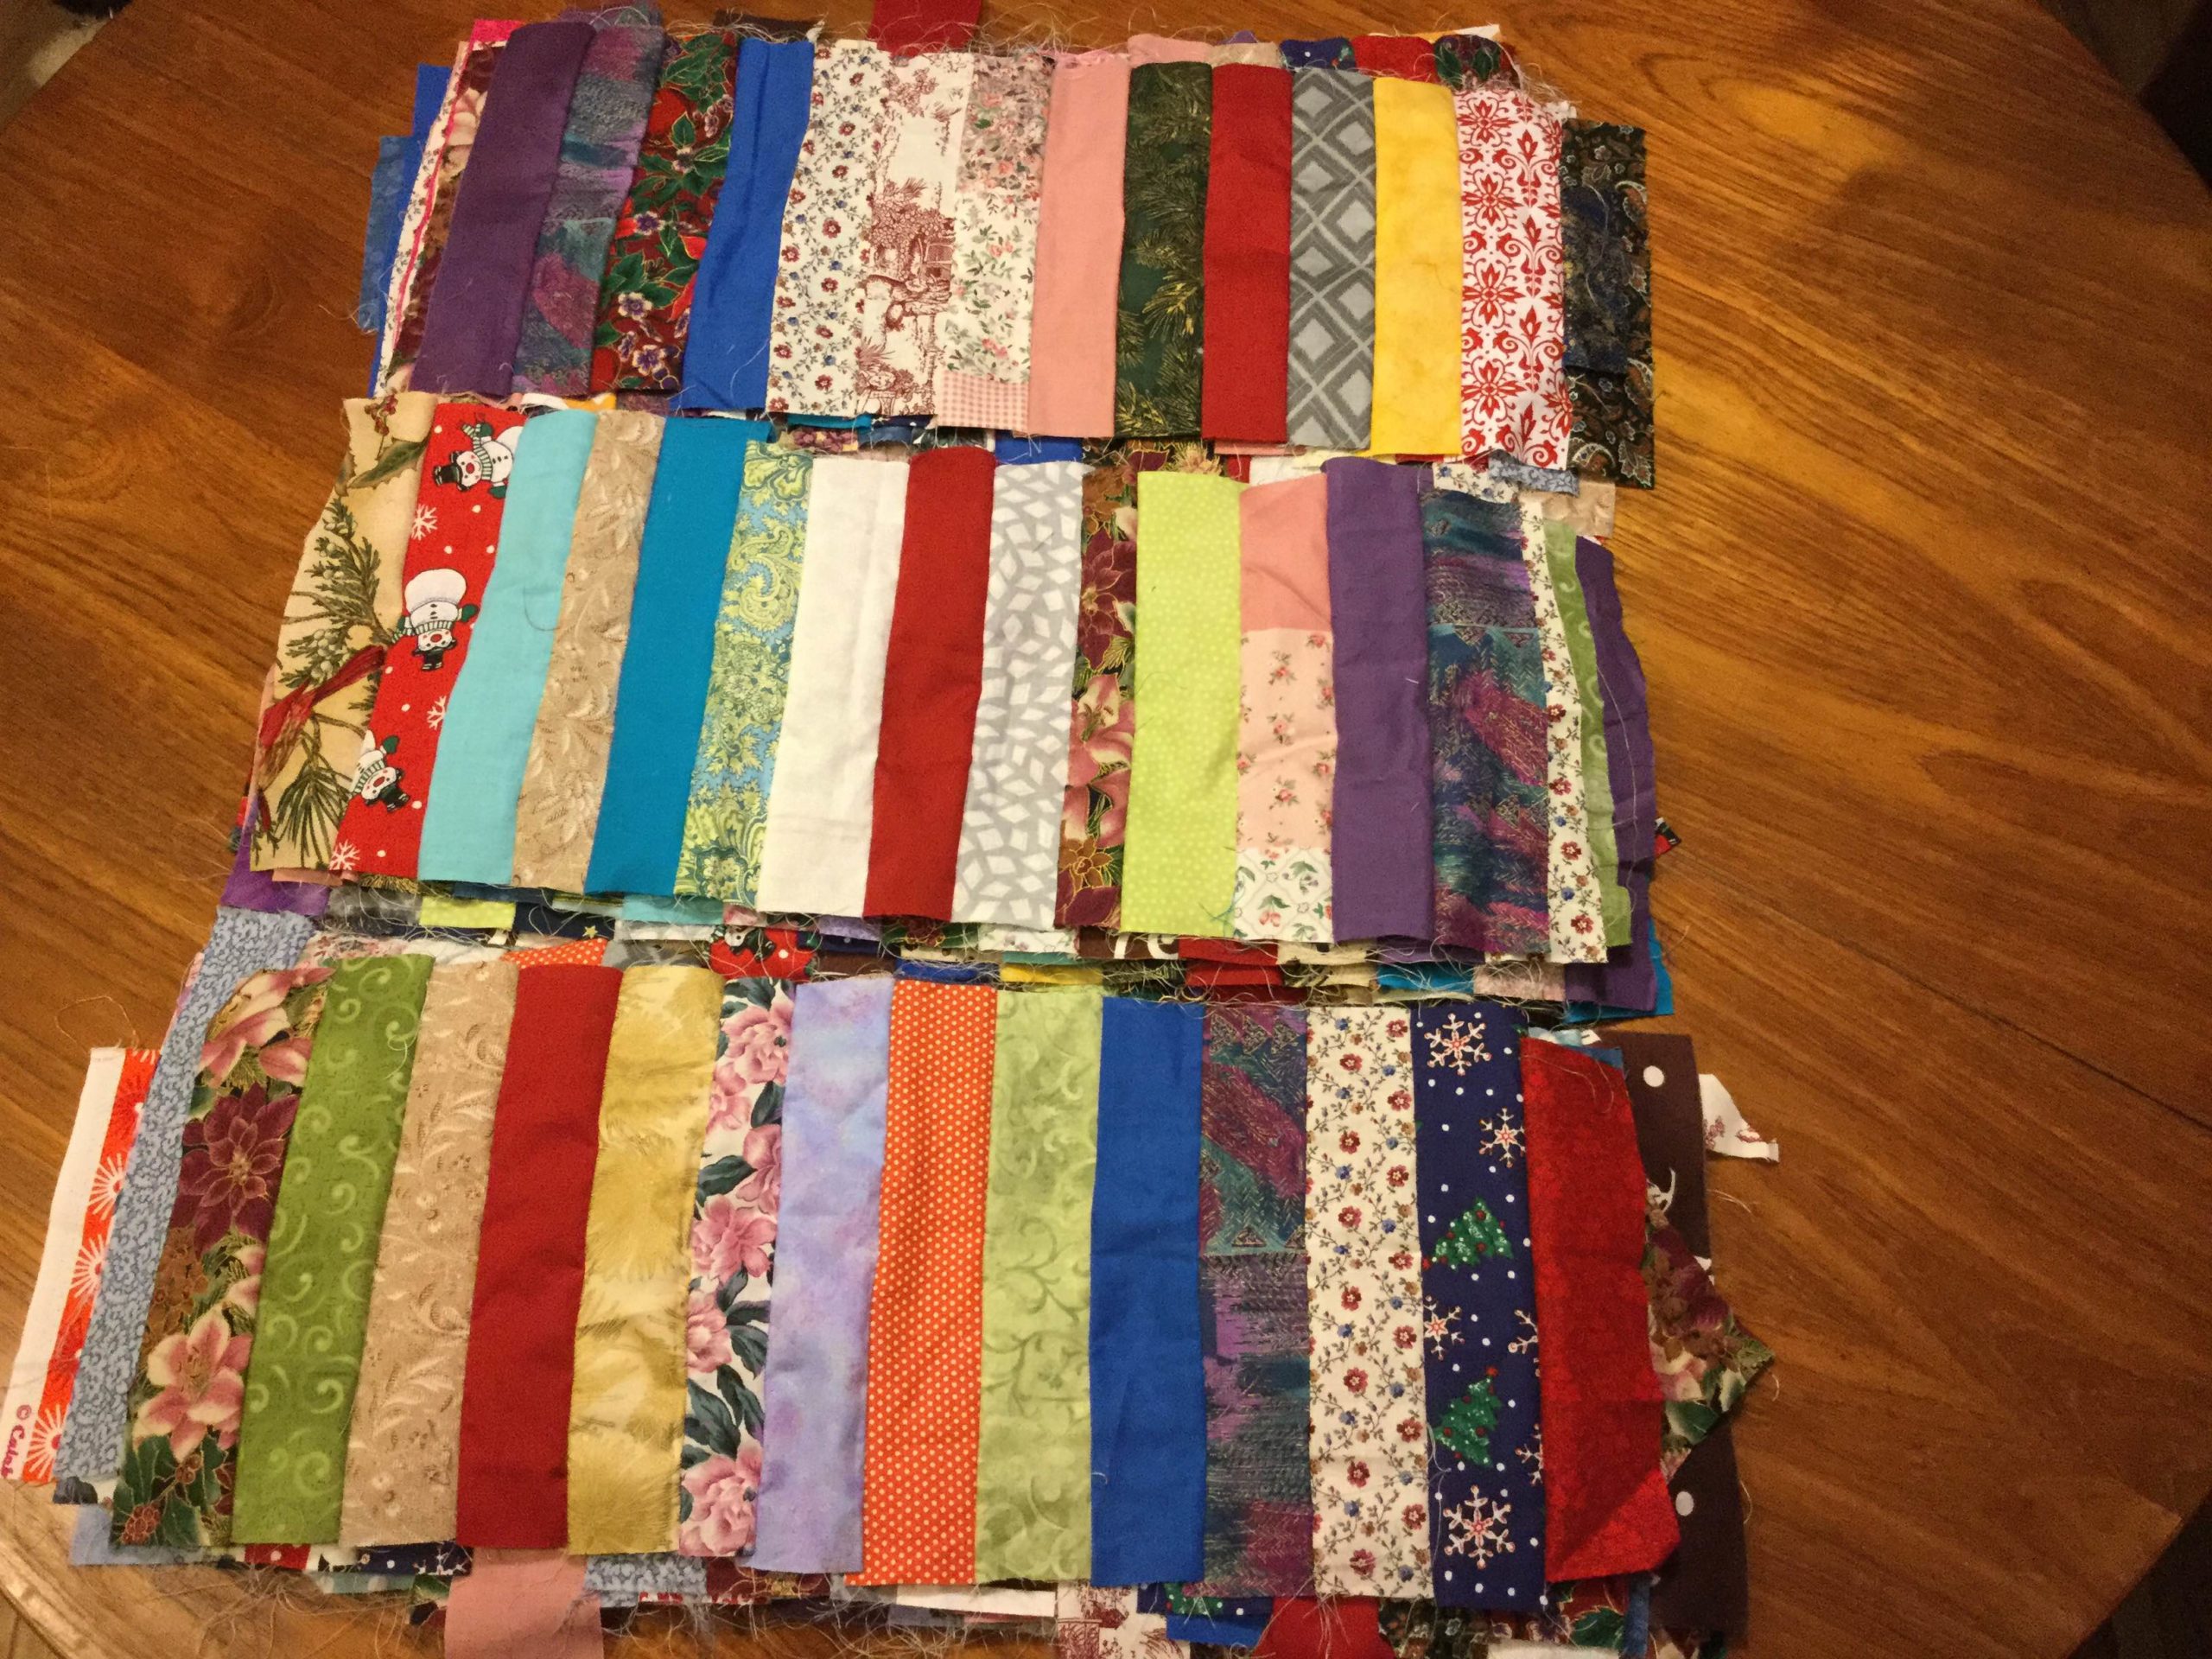
Early in 2016, I started a quilt for a friend. She’d inherited part of her Mom’s stash of fabric and was looking for a way to turn it into a quilt. The fabric that wasn’t Christmas themed was mostly pale purple and pink.
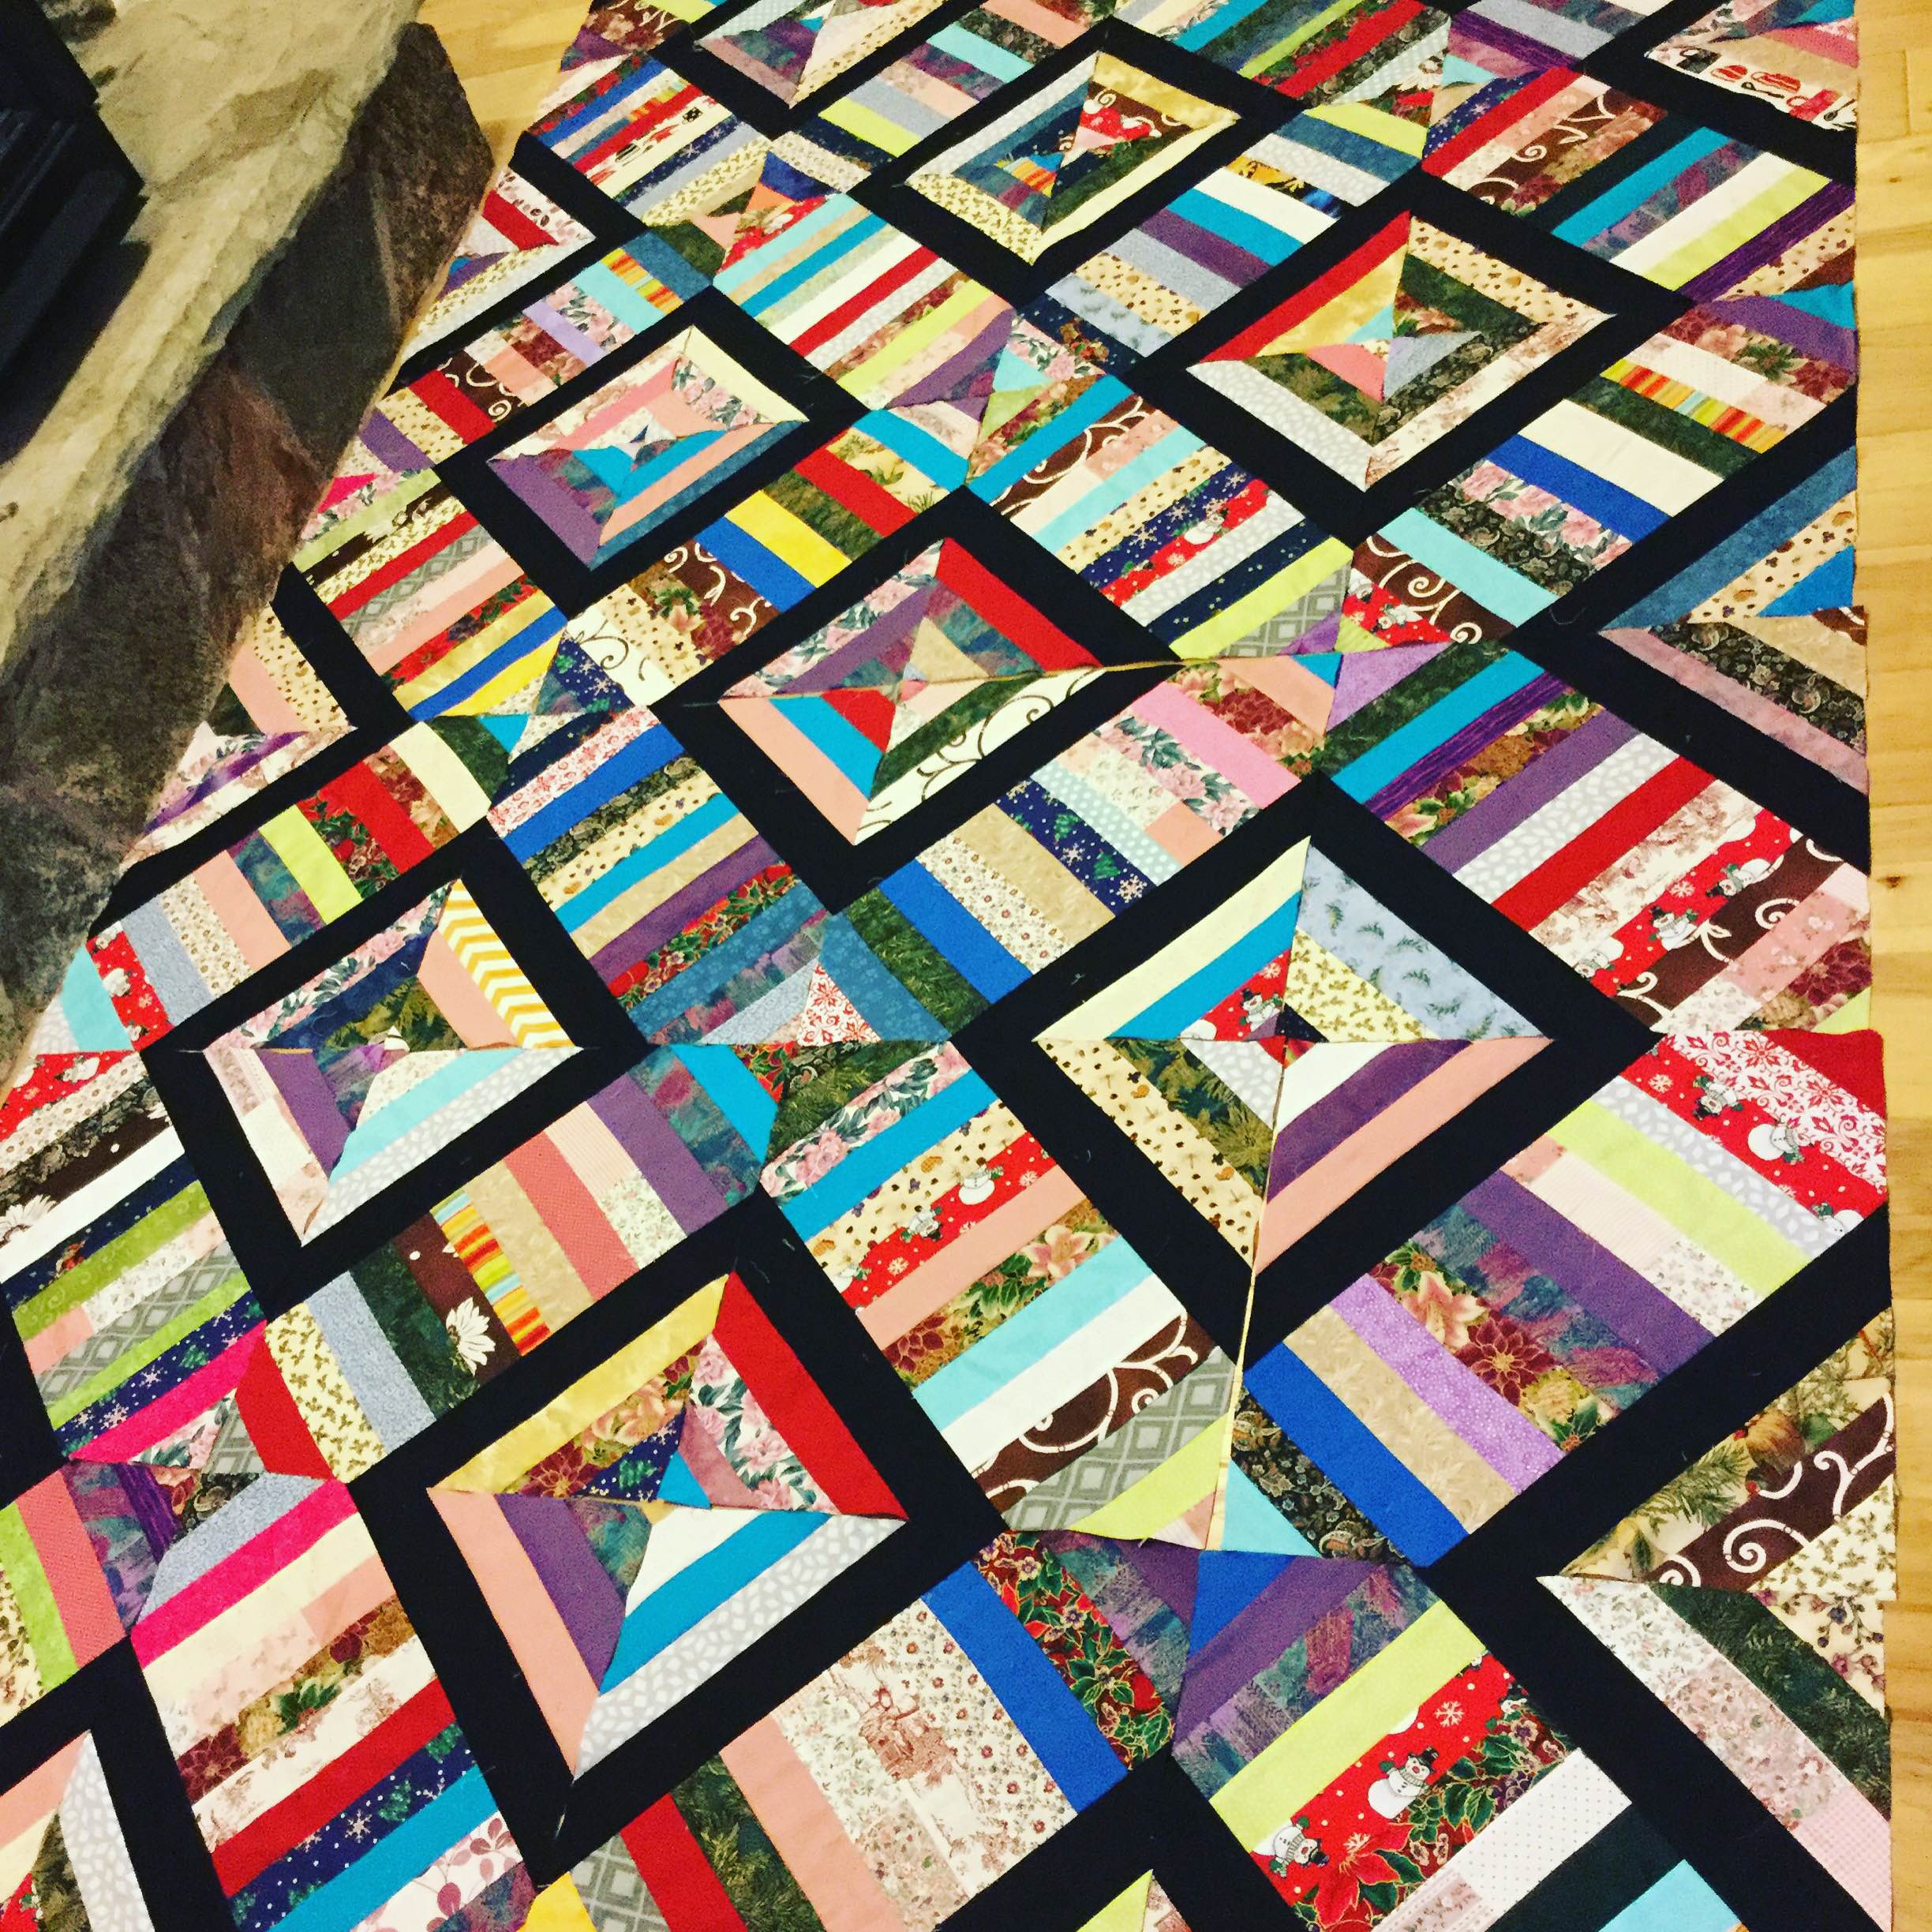
The pair of us scoured pinterest, and eventually found some string quilts. So I started hacking away at the stash. The fabrics didn’t really go together, so the string quilt was a way to make it all gel. We choose black to make the diamond pattern, since a bold neutral was the only way to override the riot of colour.
I can’t honestly say how much fabric this quilt took, since I was dealing with random yardage from a stash, as well as my own cutoffs from other projects. This quilt is an excellent scrap buster; you can use random pieces or carve up yardage, it doesn’t matter.
Materials
- 15″ square ruler
- Rotary cutter and mat
- A variety of fabric for the top, including one main sash colour (this tutorial assumes black)
- Batting
- Backing
Instructions
- Cut a variety of fabric into 8″ strips. These strips build the strips between the squares. I trimmed to 7.5″, so anything between 7.5″ and 8″ is fair game. Since I was using yardage, I cut my strips at 2″ x 8″. The odd cutoff from my own stash was larger or smaller than 2″ wide, but in general the strips were uniform.
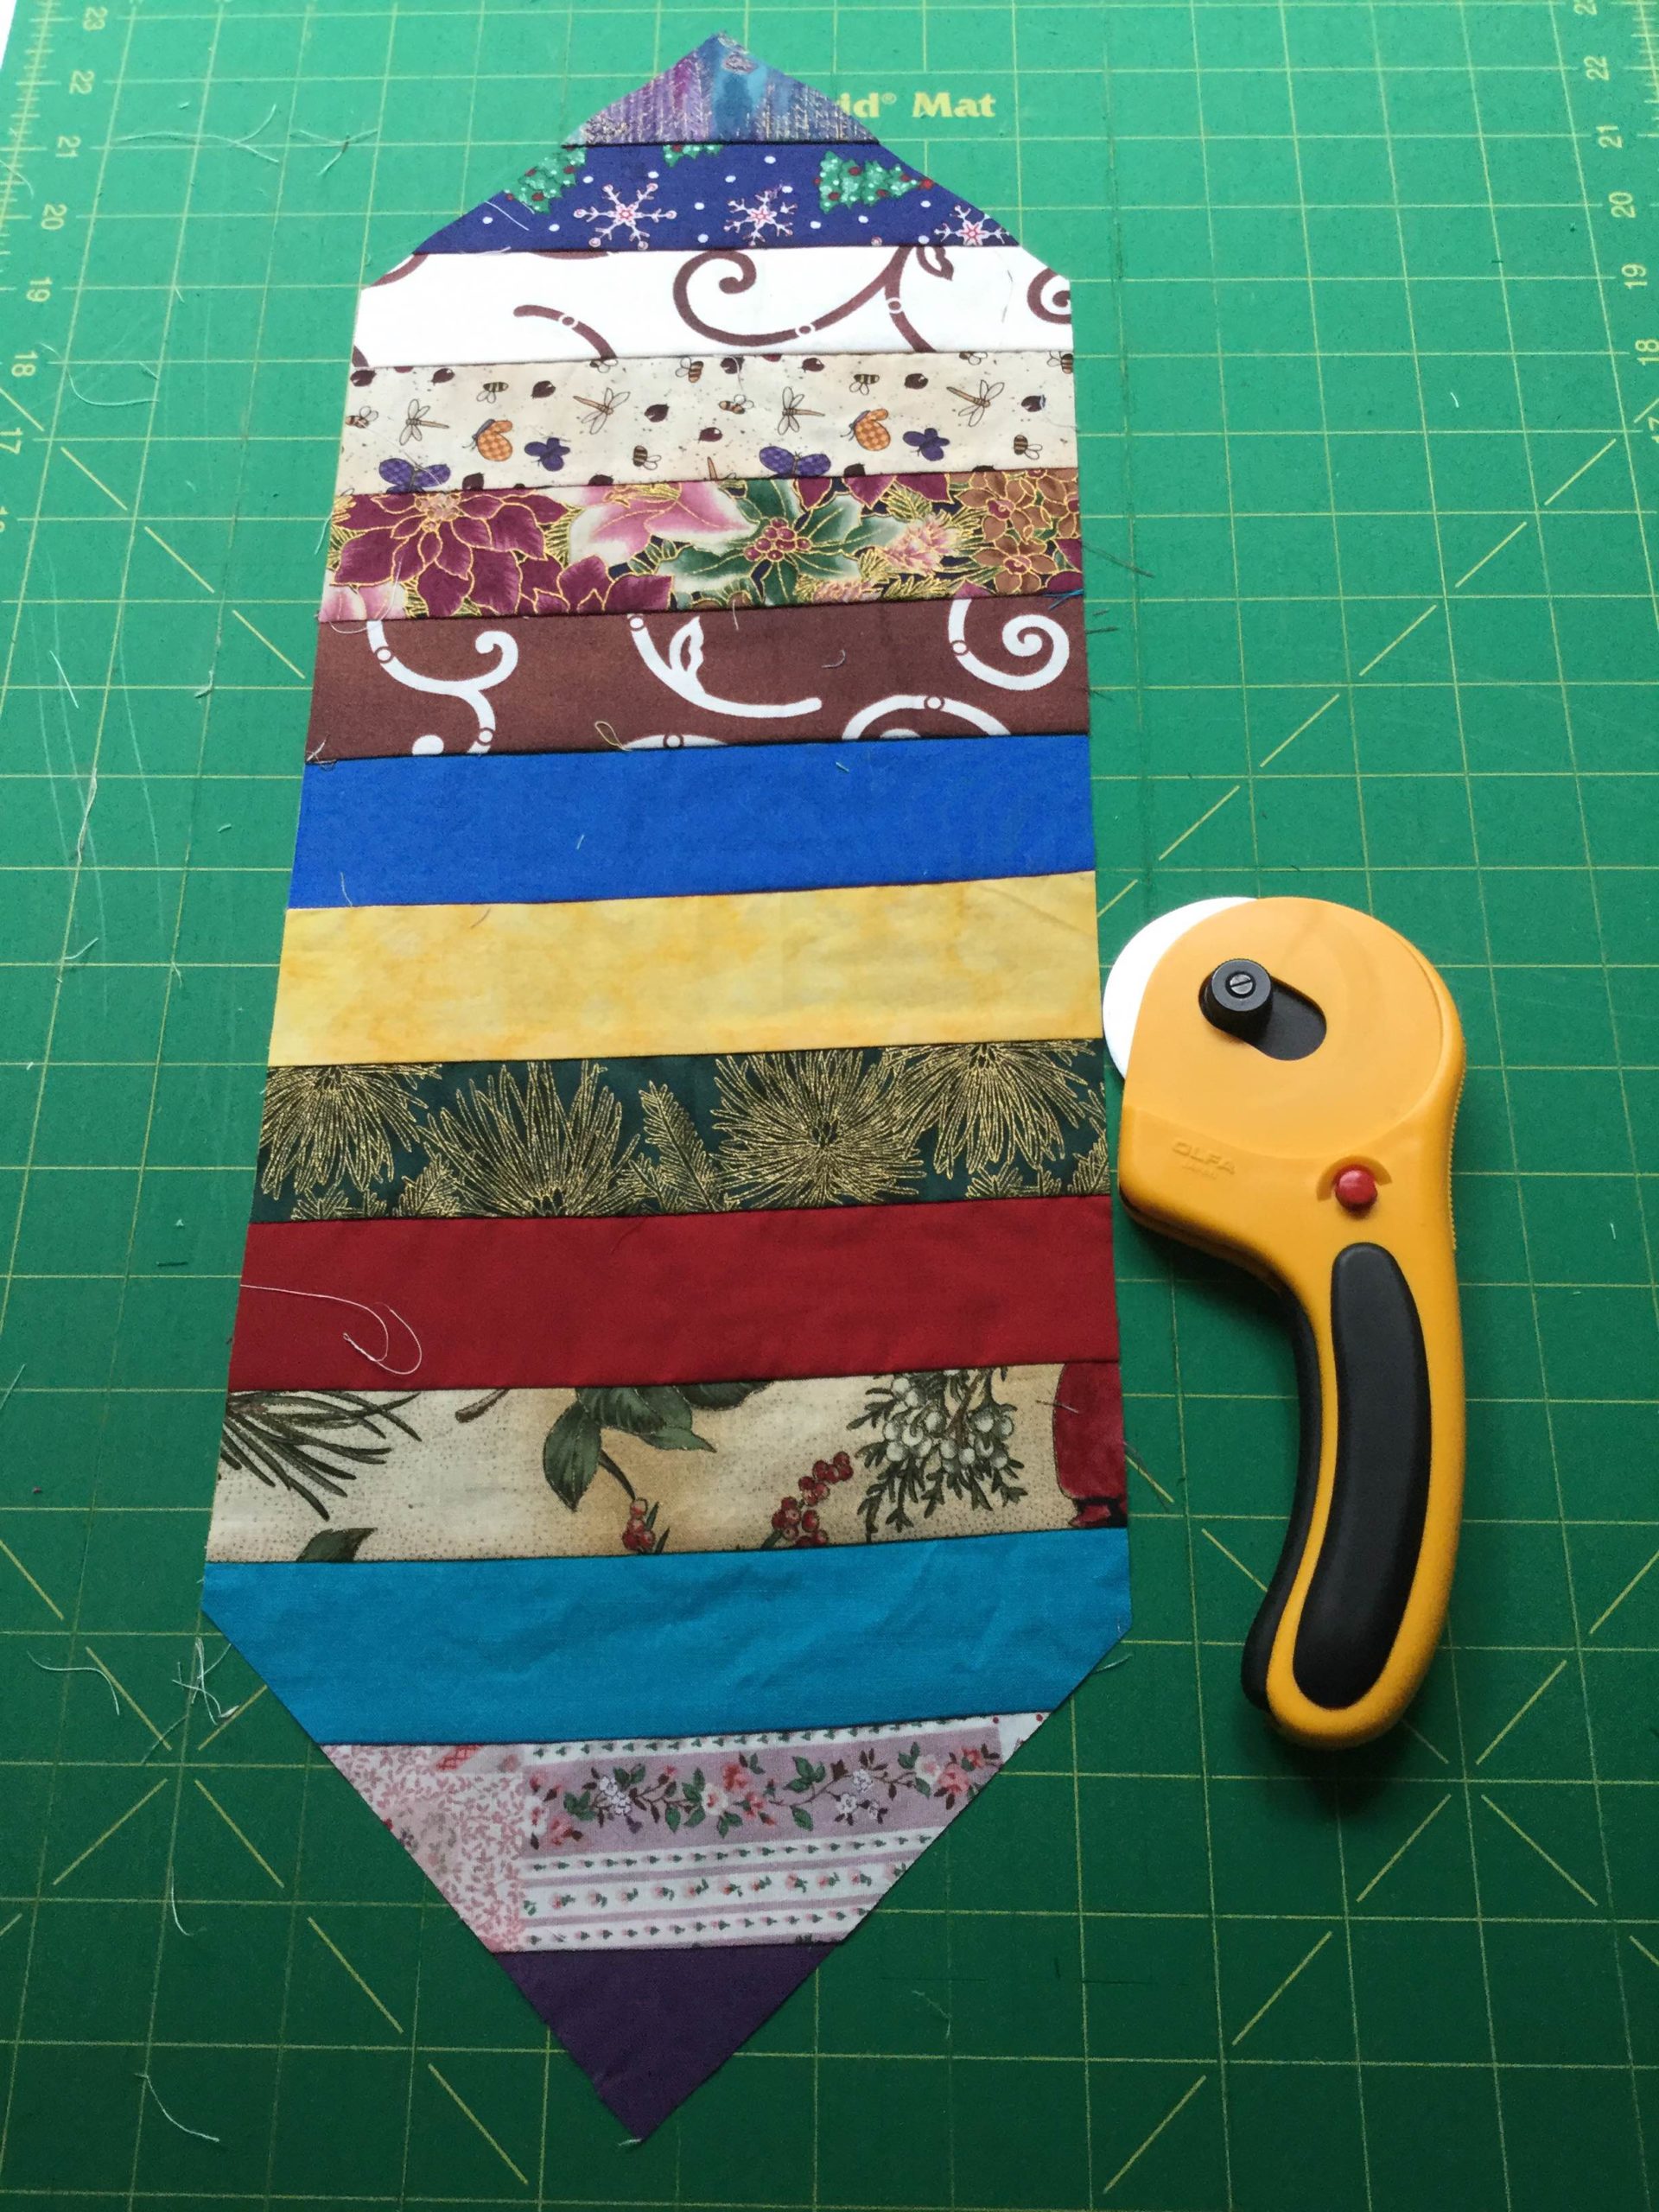
- Sew a random selection of strips together to make a 21″ long band of fabric. Use a standard, scant 1/4″ seam allowance and press to one side.

Step 2: assemble 8″ strips into 21″ long pieces
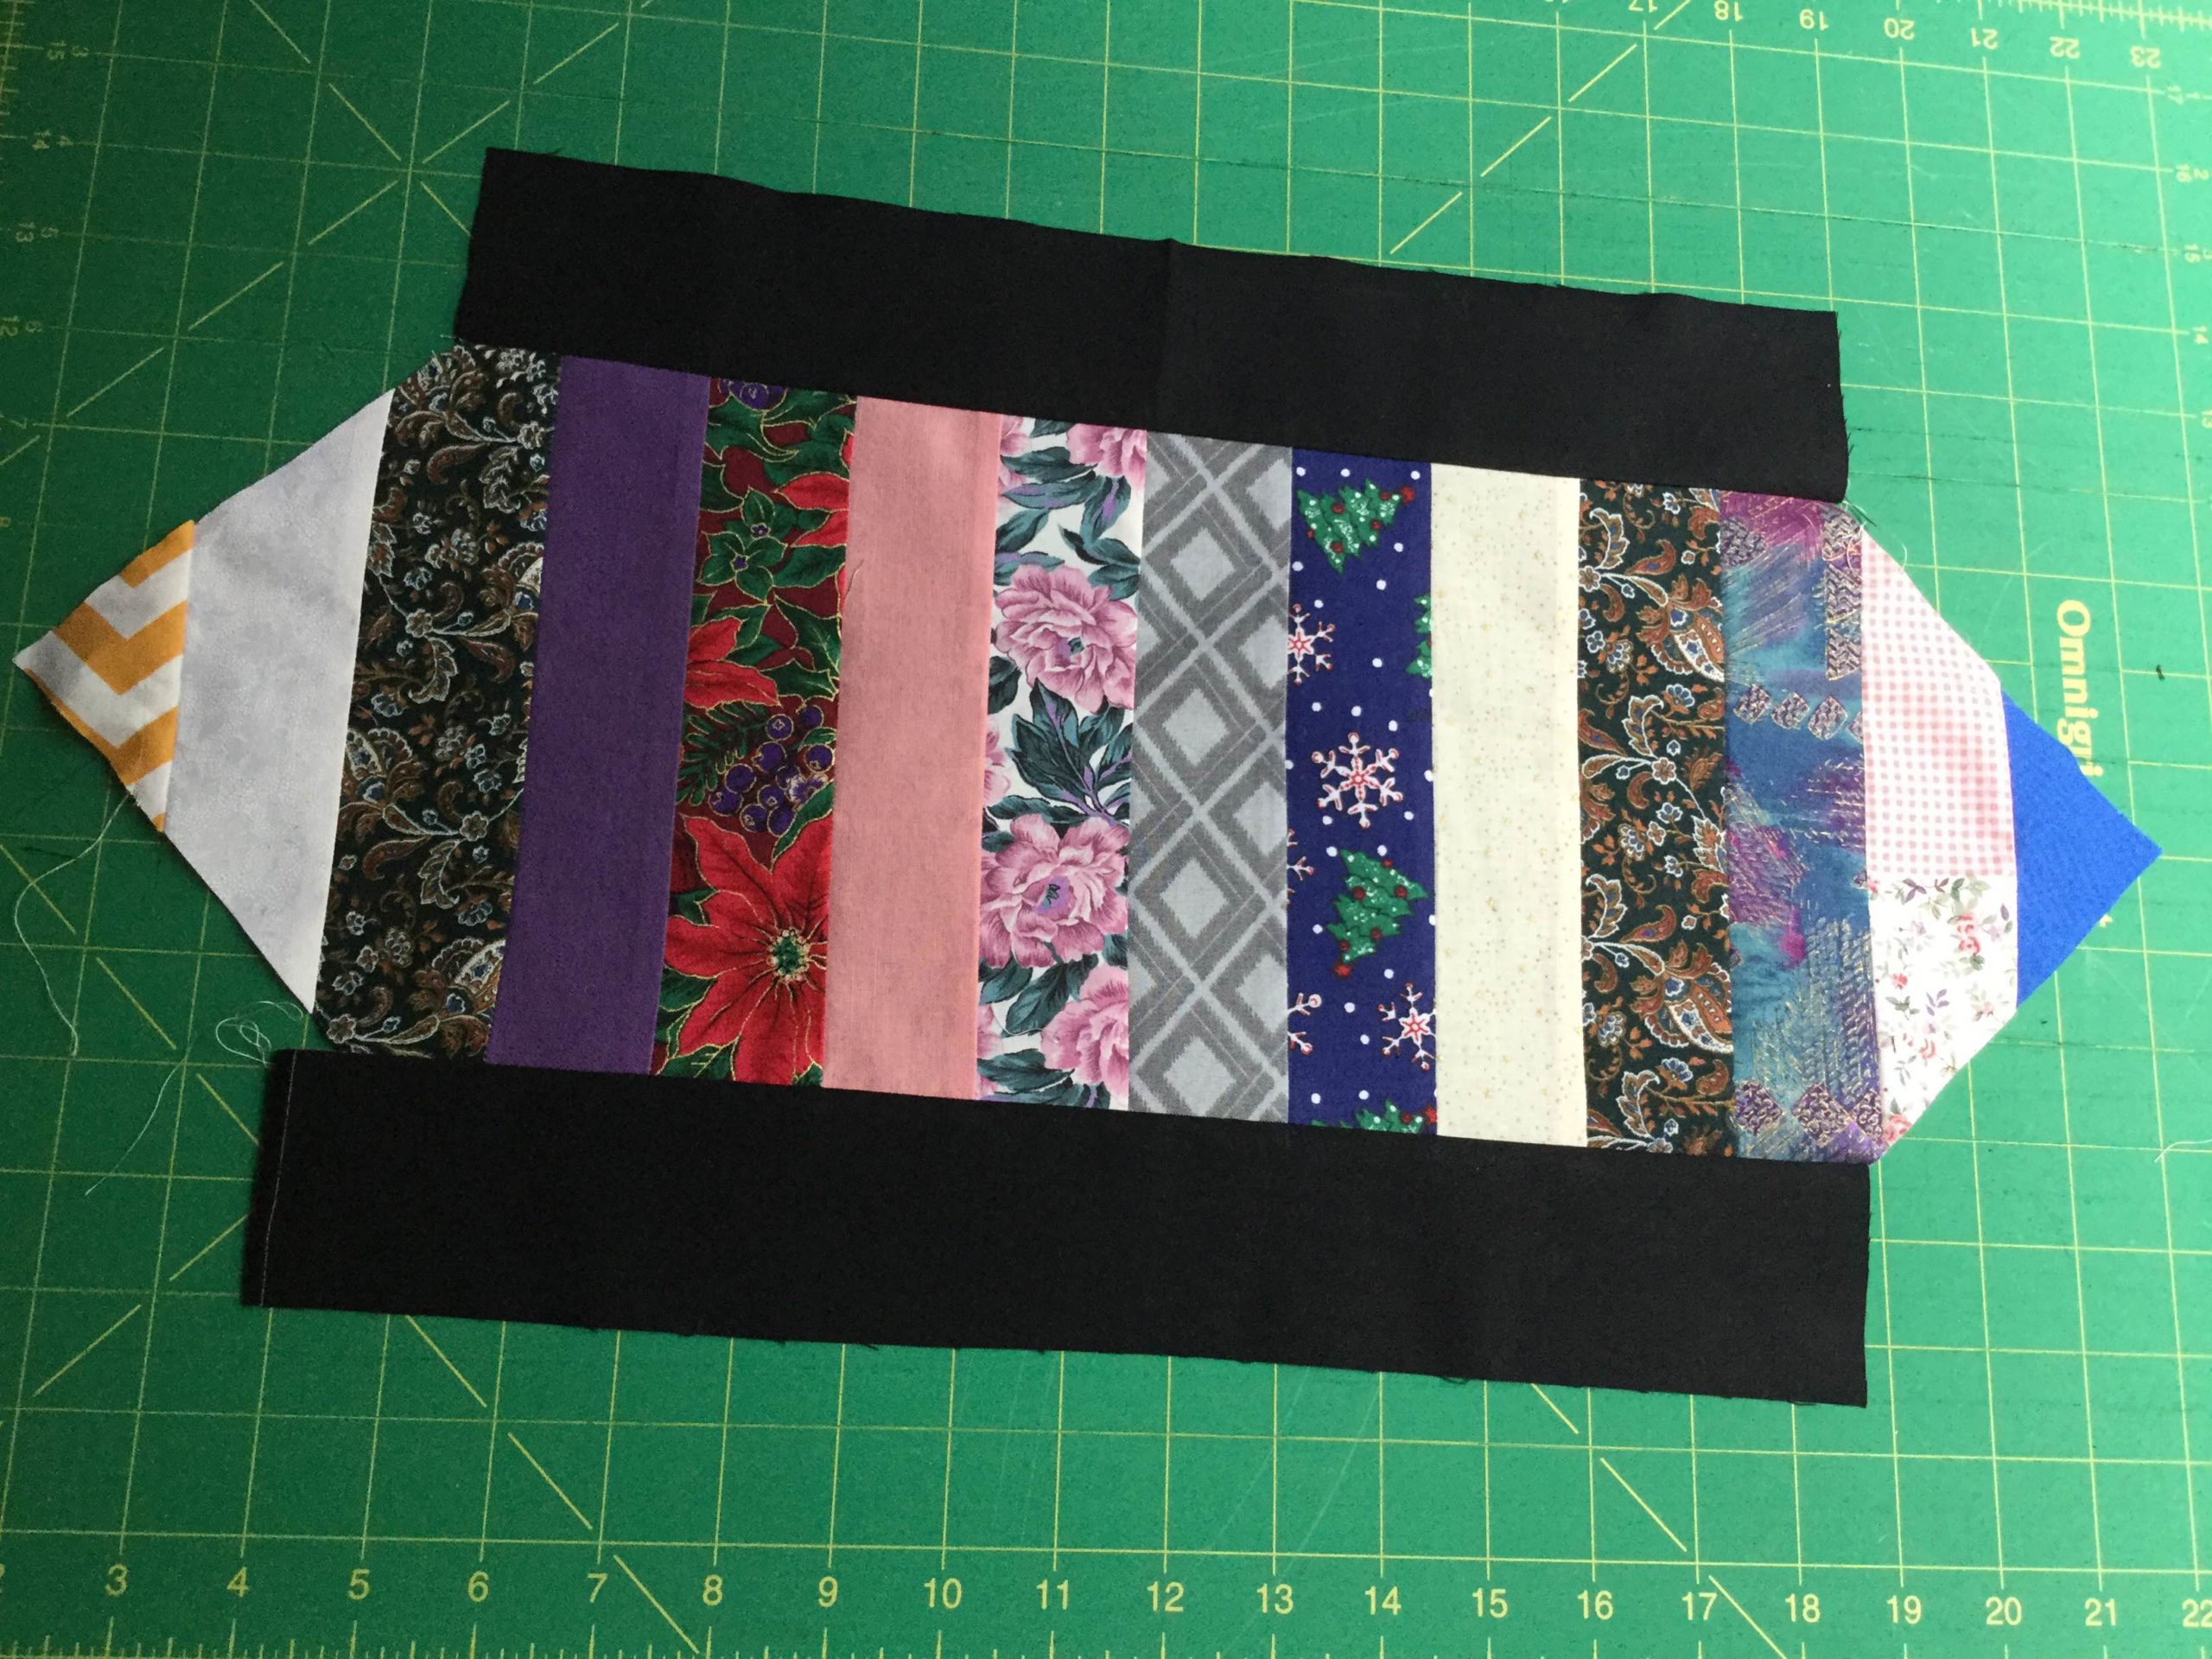
- Trim the strips to 7.5″ wide. Then, cut the corners by aligning the square ruler so that diagonal points meet the center of either end of the strip:


- Add 2.5″ wide black bands to the long sides of the strip.

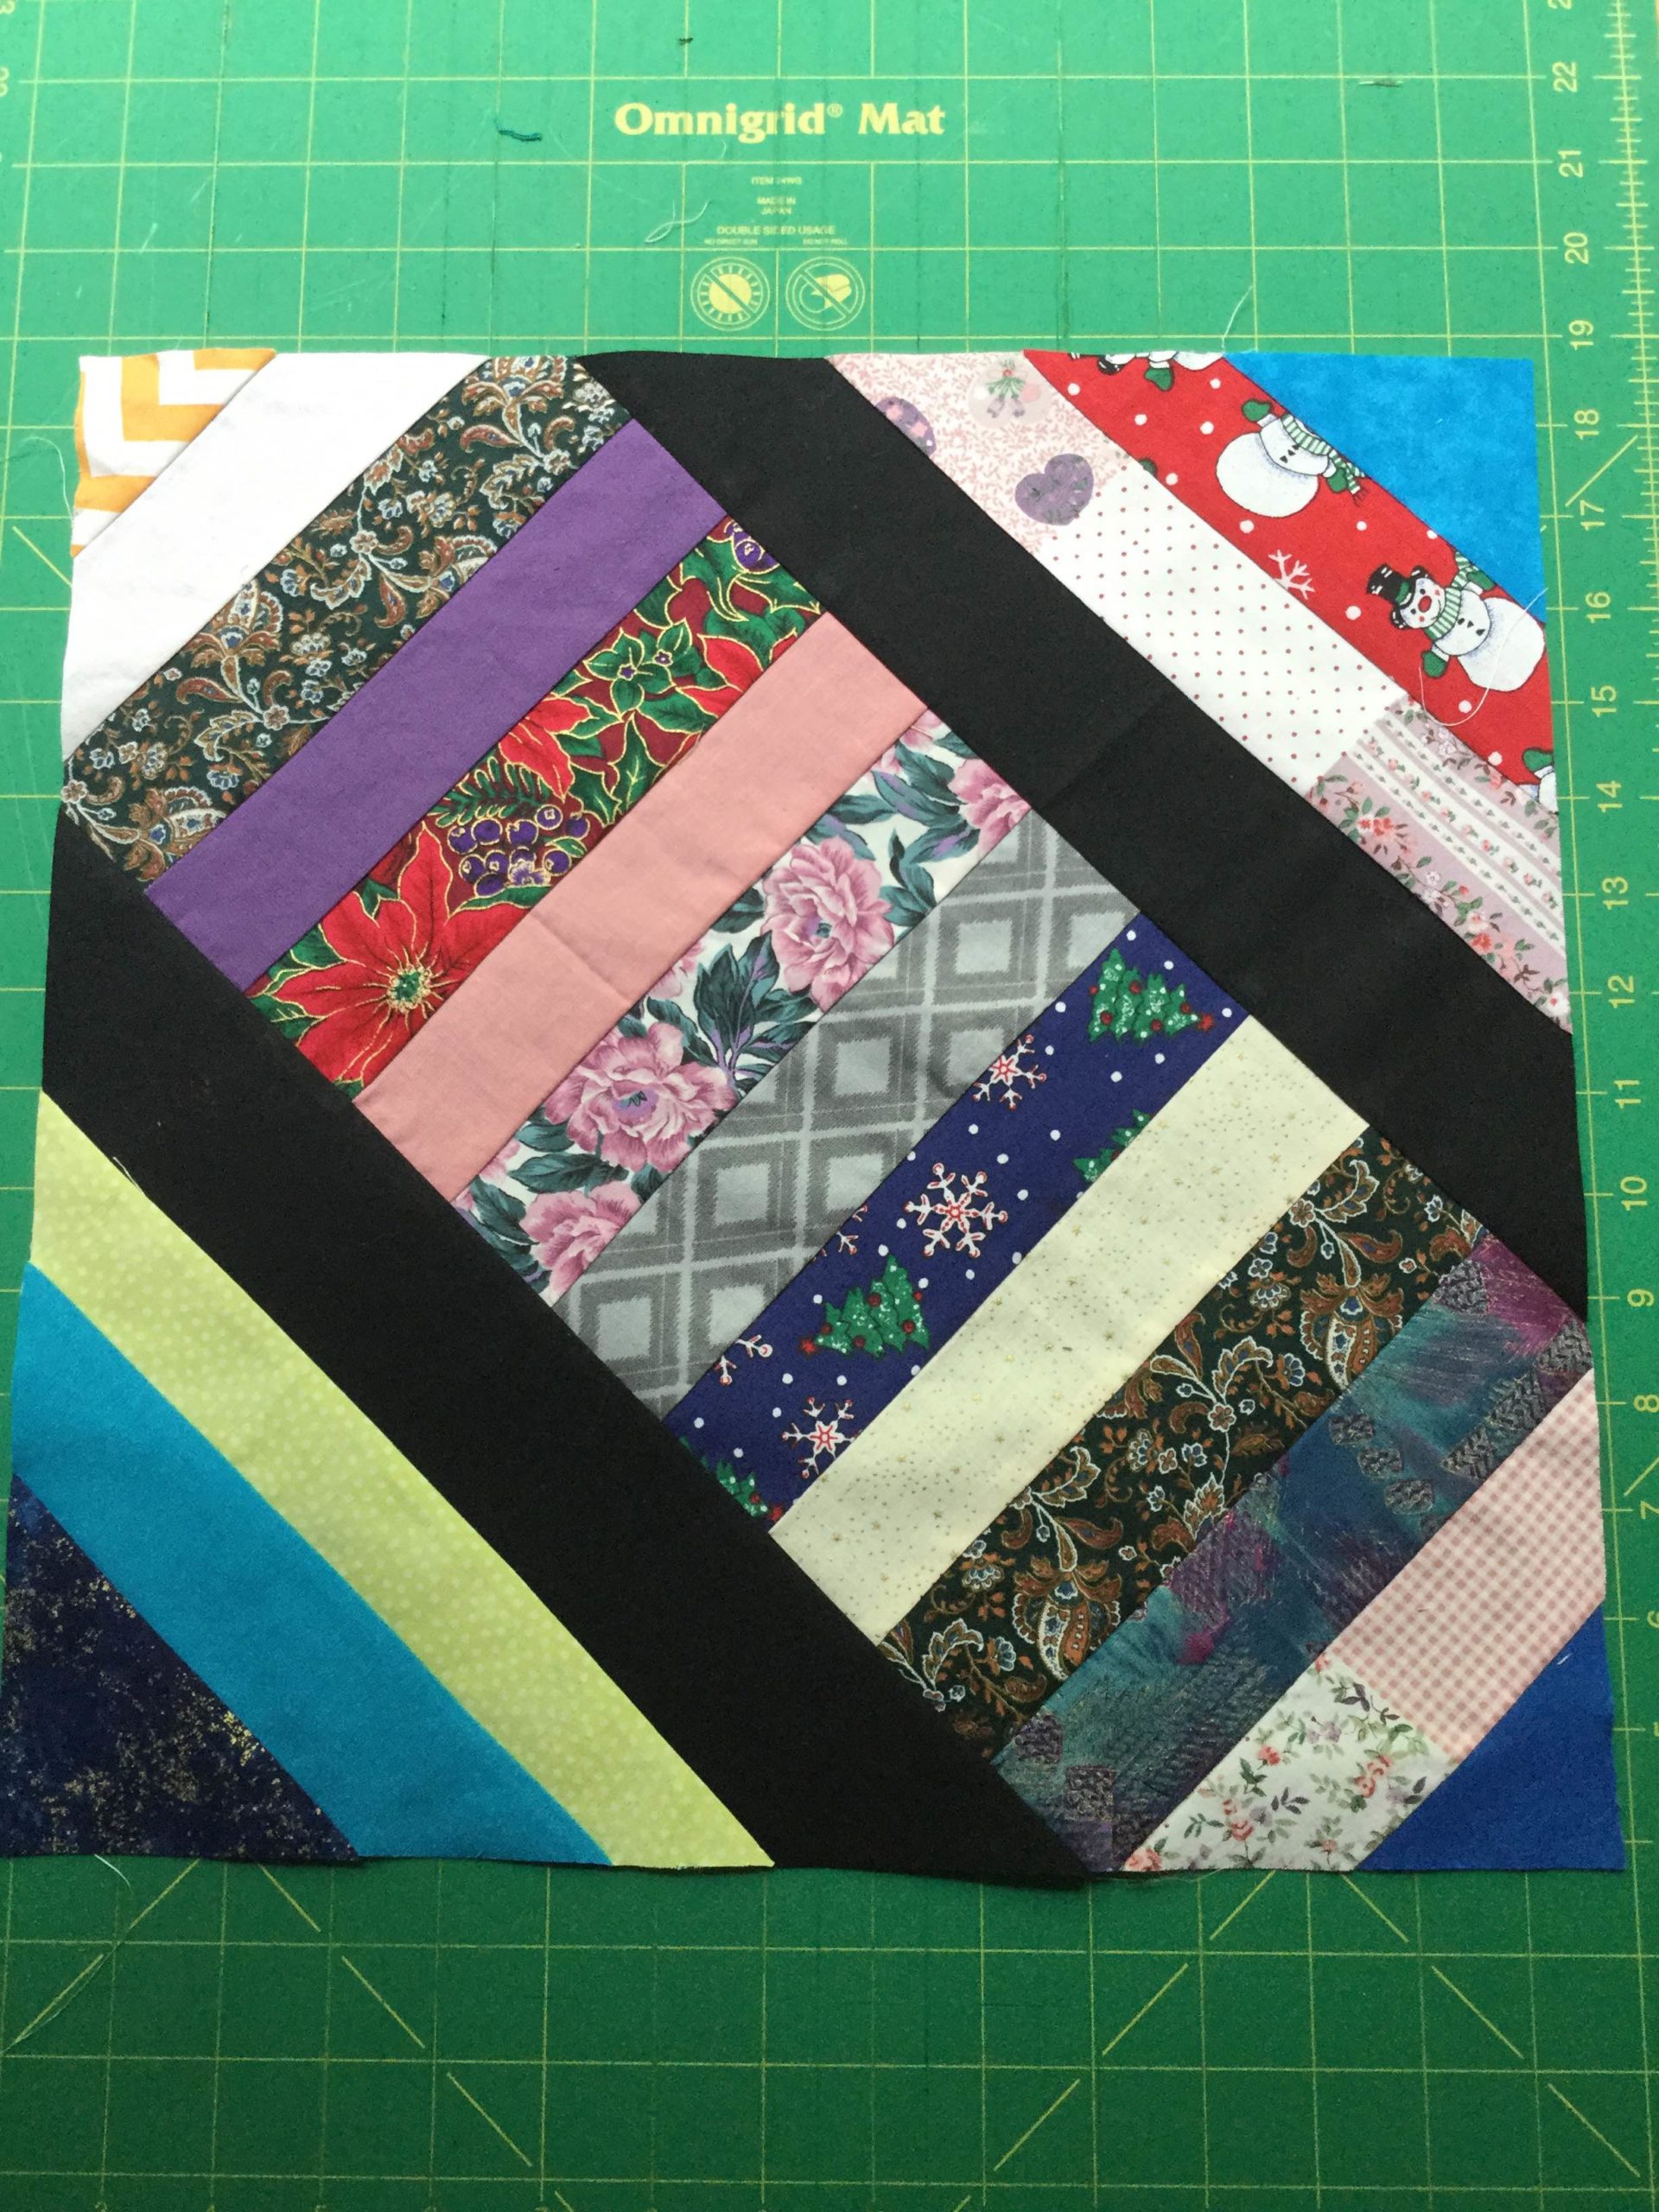
Cheater tip: I used 2.5″ strips because I wanted my binding to be black as well. This way I could cut my black fabric up and not worry about leftover strips, because I would use it as binding. - Continue adding fabric to the black bands, checking with the ruler lined up to the points you trimmed to be sure you’re adding enough to complete the square. I like pressing and trimming as I add each band so that I’m sure it works. When you’re done adding fabric, your block will look something like this:

- Align your blocks with the black sashing in alternating directions to create the squares:

Try to keep identical fabrics away from each other as you layout your quilt to keep the randomness going. When sewing a row together, ensure your black sashing lines up:

- Once the quilt top is assembled, sandwich and quilt as desired. Bind with the remainder of the 2.5″ black fabric.